Replacing a Nordhavn Muffler
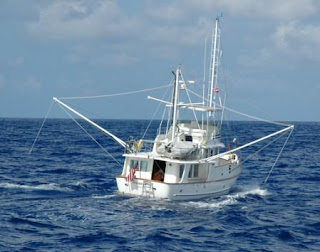
Our N50 Nordhavn, Noeta, was built in 2002. While we have replaced many of the components of our trusty trawler due to age, one that we were dreading was the muffler that was installed when she was built. Most boats have a wet exhaust system, but many Nordhavns have a dry exhaust system that includes a muffler like ours. The purpose of the exhaust system is to safely carry away noise, heat, and the byproducts of combustion. Our system and muffler rises up out of the engine room and out a dry stack at the top of our boat. After many years of use, the muffler naturally starts to deteriorate.
 |
| Rusting Muffler (sounds like a grunge rock band) |
A couple of things were going to make this project challenging:
1) The salt air and the heat from the exhaust over 21 years had likely solidified the nuts and bolts, probably making the 16 nuts and bolts nearly impossible to remove. We had heard horror stories from other Nordhavn owners about the removal process.
2) We are in Mexico. Ordering and shipping the muffler, gaskets, new bolts, heat resistant paint, and blankets to go around the muffler to Mexico was going to be a bit of a logistics nightmare.
3) We didn't know the condition of our old muffler. We assumed it was bad, because it had never been replaced, but we didn't want to remove the muffler's blankets to see it, because they would likely never go back on if the muffler was rusted. So we had to wait until we wouldn't be using the boat for awhile.
4) Would everything align? Would the old muffler fit out the existing opening in the stack? Could we get the new muffler in? Would a new muffler and parts work on a system designed over 21 years ago? What if we got all of the parts here, removed the muffler and the new muffler didn't fit?! So many questions!
Want to watch the fun beginning to end? Check out our YouTube video:
Ordering & Shipping
We ordered the muffler and all parts from Harco Exhaust in Newberg, Oregon. Pat checked and checked again, making sure that we would have the right muffler. Harco shipped it to Deko Marine in San Diego. Deko is a marine shipper who drives shipments from San Diego into all parts of Mexico for boaters, helping get them through customs through the proper channels.
I knew what week it was going to arrive in October, but was surprised when I was at the foot doctor and got a call saying the muffler was here but it was too big for them to leave at the marina office. So we agreed to meet in a parking lot 20 minutes away to have them put it in my car. It WAS giant. It took 3 guys to maneuver it into my rig.
It wasn't pretty. Holes had rusted through, and rust covered the blanket, and now the floor.
 |
| Bolts were rusted solid in place. |
 |
| It was messy work, trying to get those bolts off. |
 |
| Bolts are off! |
 |
| Gilligan the Fat Boat Cat is provided a quality check and overall supervision. |
 |
| We had to use a grinder to clean all the old gasket material off of the flanges. |
 |
| All clean! |
 |
| Once in, Pat used a high temperature liquid gasket between the gasket and muffler to fill in any imperfections on the flanges. |
To align it all perfectly, once the bolts at the base were added, we had to rig a pulley ratchet system to pull the top of the muffler towards the aft of the boat. Then the holes all aligned! Finally, the top bolts were added.
 |
| Out on a test cruise - grates are not yet installed so we could tighten the bolts back at the dock. |
 |
| Using a IR heat gun to check for hotspots. |
We were prepared for all of the issues that came up and had great support around us to help. Pat's friend Greg from MV Adagio, N47 flew down to Mexico to help with install for 2 days, because he had done it a few years prior. Ricardo and his guys spent a day with me while Pat was out of town, removing the bolts and trying to remove the muffler. He also made the grate work perfectly when we were done.
We found other support form Bob Senter with Northern Lights along with Jay Flaherty and James Knight at Yacht Tech who answered a lot of technical questions for us. Lastly, our friend Marcos took our old muffler away to be recycled. So, thanks to everyone who helped out! Couldn't have done it without you!
Overall, we are happy with the outcome of this giant boat project, but we are glad we never have to repeat it!
Read more Noeta happenings at www.mvnoeta.com


Comments
Post a Comment